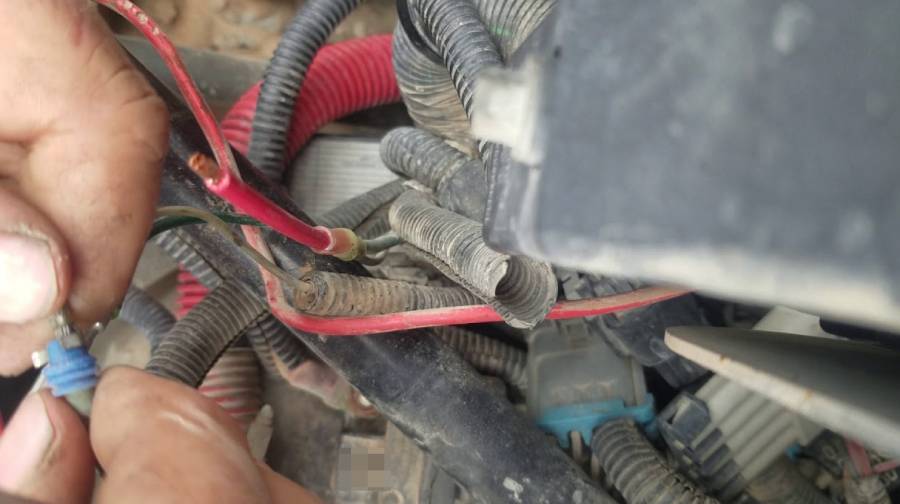
A Freightliner M2 blower motor can stop working because the motor has failed or the HVAC blower circuit is not supplying the correct power, ground, or speed-control signal. The main causes include a blown fuse, faulty relay, failed blower motor resistor or control module, damaged wiring, poor electrical connections, bad ground, faulty HVAC controls, and a worn or failed blower motor.
The symptoms provide important clues about which component to test first. A blower that does not run at any speed requires a different diagnostic approach from one that works only on certain speeds or operates intermittently. A repeatedly blown fuse can indicate an electrical short or excessive current draw, while a motor that receives proper power and ground but does not run points more directly toward motor failure.
For this reason, replacing the blower motor before testing the circuit can result in unnecessary parts replacement without fixing the actual problem. The correct approach is to identify the symptom, check the fuse and relevant control circuit, verify power and ground at the motor, inspect the wiring and connectors, and confirm motor failure before replacement. This guide explains that diagnostic process for a Freightliner M2 step by step.
Why Is the Freightliner M2 Blower Motor Not Working?
A Freightliner M2 blower motor can stop working because of a blown fuse, faulty relay, failed blower motor resistor or speed controller, damaged wiring or connectors, poor ground, faulty HVAC controls, or a failed blower motor. The exact cause depends heavily on how the blower behaves. A completely dead blower points toward a loss of electrical power, ground, control, or motor operation, while a blower that still operates at certain speeds indicates that at least part of the circuit remains functional.
A blown fuse can stop electrical power from reaching the blower circuit. However, the fuse itself may only be the visible result of another problem. A shorted wire, damaged connector, or blower motor drawing excessive current can open the fuse. Replacing a blown fuse without identifying why it failed can therefore result in the new fuse blowing again.
A faulty relay can also interrupt blower operation when the circuit uses a relay to switch electrical power to the motor. The relay must receive the required supply and control input and then provide output to the blower circuit. A relay with damaged contacts can receive a command without delivering the required output. Conversely, a relay that never receives the required command indicates that diagnosis should move upstream rather than automatically blaming the relay.
The blower speed-control circuit becomes particularly important when the fan works at some settings but not others. Depending on the Freightliner M2 configuration, blower speed may involve a resistor, resistor pack, electronic controller, HVAC control, or related circuitry. A failure in this part of the system can remove individual fan speeds while leaving the blower motor capable of running.
Wiring, connectors, and grounds can create both complete and intermittent blower failures. Loose terminals, corrosion, damaged insulation, overheated connectors, excessive circuit resistance, and poor ground connections can reduce or interrupt current flow. These faults may change with vibration, temperature, or electrical load, which explains why some blower problems disappear and return without warning.
The blower motor itself becomes a stronger suspect after the circuit has been tested. If the motor receives the required power and has a good ground but does not operate, the evidence points more directly toward an internal motor fault. Worn internal components can also cause intermittent operation, abnormal noise, or a motor that temporarily starts after vibration or tapping. The key diagnostic principle is to verify the electrical conditions at the motor before replacing it.
What Should You Check First When the Freightliner M2 Blower Motor Stops Working?
Check the exact blower symptom first, then inspect the applicable fuse and continue through the electrical circuit until the failed component or connection is isolated. Starting with the symptom prevents unnecessary testing because a blower that is completely dead requires a different diagnostic path from one that works only on high speed, stops intermittently, or repeatedly blows a fuse.
First, operate the HVAC blower through every available fan-speed setting. Record whether the motor remains completely inactive, operates only at specific speeds, runs weakly, or starts and stops intermittently. A blower that works at one speed proves that the motor can still operate under at least one circuit condition. That evidence shifts attention toward the speed-control circuit, wiring, connectors, or HVAC controls rather than immediately requiring motor replacement.
Second, check the applicable blower circuit fuse. A fuse should not be judged only by looking at the element because electrical testing provides stronger evidence. Verify continuity where appropriate and confirm that the circuit has the expected voltage. If the fuse is open, determine why it failed before repeatedly installing replacements. A second blown fuse indicates that an underlying electrical problem still exists.
Third, check the relevant relay and power-supply path when the vehicle configuration uses a relay for blower operation. Verify the supply side, control side, and switched output rather than replacing the relay based solely on the symptom. If power enters the relay but does not leave when the relay is correctly commanded, the relay or its connection becomes a likely fault. If the required input or command is missing, continue diagnosis toward the upstream circuit.
Fourth, test power and ground directly at the blower motor connector while the blower is commanded to operate. This test divides the problem into two major diagnostic paths. Correct power and ground with a non-running motor strongly support a motor fault. Missing power or an inadequate ground means the circuit must be repaired before the motor can be accurately condemned.
Finally, inspect the speed-control components, HVAC controls, wiring, and connectors according to the previous test results. Look specifically for loose terminals, corrosion, overheated connections, melted connector housings, damaged wiring, and excessive resistance. This sequence creates a controlled diagnostic path: identify the symptom, verify circuit protection, check power delivery, verify power and ground at the motor, and isolate the component responsible for the failure.
How Do You Check the Freightliner M2 Blower Motor Fuse?
Check the Freightliner M2 blower motor fuse by identifying the correct HVAC blower circuit fuse, testing it for continuity, and verifying voltage at the fuse terminals. A blown fuse interrupts current flow to the protected circuit, which can leave the blower motor completely inoperative. The exact fuse location, cavity number, and amperage can vary by model year and electrical configuration, so they should be confirmed using the fuse-panel information or service documentation for the specific truck.
Start with a visual inspection, but do not use appearance as the only test. A fuse element can have damage that is difficult to see through the housing. A multimeter can provide a more reliable result by checking continuity across a removed fuse or voltage on both sides of an installed fuse when the circuit conditions allow it. Voltage present on the supply side but absent on the protected side indicates an open fuse.
A blown blower fuse should also be treated as evidence of a circuit problem rather than automatically as an isolated failure. Fuses open when current exceeds the protection threshold. In a blower circuit, excessive current can result from a short to ground, damaged wiring, overheated terminals, or a blower motor that is drawing more current than the circuit is designed to carry. The cause should be identified before the repair is considered complete.
Repeated fuse failure provides an especially useful diagnostic clue. If a replacement fuse of the correct rating blows again when the blower is activated, stop replacing fuses and inspect the circuit. Check the blower motor connector and wiring for melted insulation, terminals contacting ground, corrosion, and heat damage. The motor itself should also be tested because an internal motor problem or mechanical resistance can increase current demand.
Never install a higher-amperage fuse to prevent repeated failure. The fuse rating protects the wiring and electrical components from excessive current. Increasing that rating can allow the circuit to overheat before the fuse opens, potentially damaging connectors, wiring, or other components. Use the specified fuse rating and repair the condition responsible for the excessive current.
How Do You Check the Freightliner M2 Blower Motor Relay?
Check the Freightliner M2 blower motor relay by verifying its power supply, control input, switched output, and electrical connections while the blower is commanded to operate. A relay acts as an electrically controlled switch, so diagnosing it requires determining whether the relay receives the conditions needed to activate and whether it successfully passes current to the downstream circuit.
Begin by confirming whether the specific Freightliner M2 configuration uses a relay in the blower circuit and identify the correct relay from the applicable electrical information. Model year and HVAC configuration can affect circuit design, so a relay location or terminal assignment from a different M2 should not automatically be applied to the truck being diagnosed.
A functioning relay requires both the appropriate control condition and an available power supply. If these inputs are present but the relay does not provide the expected switched output, the relay contacts or internal mechanism may have failed. If the relay does not receive power or the required control input, replacing it will not correct the problem because the fault exists elsewhere in the circuit.
Inspect the relay socket at the same time. Loose terminals, corrosion, discoloration, melted plastic, or signs of overheating can increase electrical resistance and prevent reliable current delivery even when the relay itself is functional. A damaged socket can also create intermittent operation because vibration changes terminal contact while the truck is moving.
The diagnostic result should determine the next test. Correct relay input with no switched output directs attention to the relay or its terminal connections, while missing relay input directs diagnosis toward the upstream power or control circuit. If the relay operates correctly and supplies its downstream circuit, continue toward the blower motor connector and verify whether the required power actually reaches the motor under operating conditions.
How Do You Test the Freightliner M2 Blower Motor for Power and Ground?
Test the Freightliner M2 blower motor for power and ground at the motor connector while the HVAC blower is commanded to run. This test determines whether the motor itself has failed or an upstream electrical problem is preventing it from operating. The three main results are correct power and ground, missing power, or a poor ground, and each result leads to a different diagnostic path.
Start by accessing the blower motor electrical connector and inspecting it before taking measurements. Look for loose terminals, corrosion, discoloration, melted plastic, damaged wires, or terminals that have lost their grip. A connector with excessive resistance can develop heat and reduce the voltage available to the motor, so a visually damaged connector should not be ignored even if the blower occasionally operates.
Set a digital multimeter to the appropriate DC voltage range and test the circuit with the blower commanded on. The exact voltage and terminal identification should be verified against service information for the specific Freightliner M2 model year and HVAC configuration. Testing the circuit while it is operating is important because an unloaded circuit can sometimes show voltage even though a high-resistance connection prevents it from carrying enough current to operate the motor.
Next, verify the ground side of the circuit. A ground connection can be physically connected but still have excessive resistance from corrosion, loose terminals, damaged wiring, or a poor chassis connection. Voltage-drop testing under load is useful for identifying this type of fault because it evaluates how the circuit behaves while current is flowing rather than relying only on a continuity test.
The results narrow the fault considerably. If the blower motor receives the required power and has a good ground but does not run, the blower motor becomes the primary suspect. If power is missing, continue testing the fuse, relay, speed-control circuit, HVAC controls, connectors, and supply wiring. If the ground is poor or missing, repair the ground circuit before replacing the motor.
Avoid condemning the blower motor based only on a continuity or resistance measurement. The circuit must work under electrical load, and a weak connection can pass a low-current meter test while failing when the motor demands substantially more current. Power, ground, connector condition, and circuit behavior under load provide stronger diagnostic evidence.
How Do You Know If the Freightliner M2 Blower Motor Is Bad?
A Freightliner M2 blower motor is most likely bad when it receives the required power and ground but fails to run correctly. This result separates motor failure from faults in the fuse, relay, wiring, ground, and speed-control circuit. Confirming these electrical conditions before replacement prevents a working motor from being replaced because of an upstream circuit problem.
A completely dead motor is one possible failure pattern, but blower motors can fail gradually. Worn internal electrical or mechanical components can cause intermittent operation, reduced speed, abnormal noise, or failure after the motor becomes warm. A motor that starts after the housing is tapped or disturbed can also indicate an internal motor problem, although wiring and connector movement must be ruled out before using that symptom as confirmation.
Abnormal mechanical behavior provides another diagnostic clue. Grinding, squealing, scraping, or other unusual noises can indicate wear or interference in the blower assembly. Mechanical resistance can make the motor harder to turn and increase electrical load. Excessive current draw can then contribute to overheated terminals, damaged connectors, or repeated fuse failure.
Current draw can therefore provide useful supporting evidence when the correct specifications and test procedure are available for the vehicle. A motor drawing excessive current may still rotate but place abnormal load on its electrical circuit. The applicable service specification should be used instead of assuming that one current value applies to every Freightliner M2 configuration.
The strongest diagnosis combines multiple pieces of evidence rather than relying on one symptom. Correct power, a verified ground, intact wiring and connectors, and a motor that still does not operate provide a direct basis for suspecting blower motor failure. In contrast, missing voltage or an inadequate ground means the electrical circuit should be repaired and retested before deciding that the motor needs replacement.
Why Does the Freightliner M2 Blower Motor Work Only on Certain Speeds?
A Freightliner M2 blower motor that works on some fan speeds but not others usually has a fault in the blower speed-control circuit rather than a completely failed blower motor. Depending on the model year and HVAC configuration, this circuit can involve a blower resistor, resistor pack, electronic speed controller, HVAC control unit, electrical connectors, and associated wiring. The exact circuit design should be confirmed using service information for the specific truck.
The working fan speeds provide useful diagnostic evidence. If the blower motor operates normally at one setting, the motor has demonstrated that it can receive electrical current and rotate. Diagnosis should therefore focus first on the components that change blower speed. A failed resistor path, controller output, HVAC control input, or circuit connection can prevent one or more speed settings from operating while leaving another setting functional.
Inspect the speed-control component and its connector for heat damage, corrosion, loose terminals, and melted plastic. Blower circuits carry enough current for a poor electrical connection to generate heat. As terminal resistance increases, voltage available to the circuit can decrease and the connection can become hotter. Replacing only a damaged resistor or controller without inspecting the connector can allow the same problem to return.
Electrical testing should establish whether the speed-control component receives the required input and produces the expected output for each commanded fan setting. If the input changes correctly but the output does not respond as required, the speed-control component becomes a stronger suspect. If the necessary input is missing, continue diagnosis toward the HVAC controls, wiring, connectors, or upstream power supply instead of replacing the speed controller.
A blower that works only on certain settings should not automatically be diagnosed as having a bad resistor because Freightliner M2 HVAC configurations can differ. The correct repair is determined by identifying which speed-control system the truck uses and testing its input, output, wiring, and connector condition. This approach distinguishes a failed control component from an electrical supply or HVAC control problem.
Why Does the Freightliner M2 Blower Motor Work Intermittently?
A Freightliner M2 blower motor can operate intermittently because of worn motor components, loose electrical terminals, damaged wiring, a poor ground, an overheating connector, or an intermittent fault in the blower control circuit. Intermittent failures are different from complete failures because the circuit works under some conditions and fails under others. Vibration, temperature, electrical load, and changes in terminal contact can determine when the symptom appears.
The circumstances surrounding the failure can help isolate the cause. A blower that cuts out when the truck travels over bumps points toward a connection, wiring, or internal motor fault affected by vibration. A blower that changes operation when the harness or connector is moved directs attention toward terminals and wiring. These observations do not prove which component has failed, but they identify the part of the circuit that requires testing.
A motor that stops after operating for a period and works again after cooling requires a different diagnostic approach. Heat can change electrical resistance and expose faults in motor components, controllers, connectors, and terminals. Inspect the affected circuit for discoloration, melted plastic, unusual connector temperature, or other evidence of excessive resistance and heat.
A blower that temporarily starts after the motor housing is tapped can indicate worn internal motor components. However, tapping also creates vibration that can disturb a loose connector or damaged wire. Verify power and ground while the failure is actually present whenever possible. Correct power and ground at the non-running motor provide much stronger evidence of motor failure than the tapping test alone.
Intermittent faults are easiest to isolate when measurements are taken during the failure. If power disappears when the blower stops, trace the supply or control circuit upstream. If ground is lost, diagnose the ground path. If correct power and ground remain present while the motor stops, the evidence points toward an internal blower motor problem. Recording these changes prevents an intermittent electrical fault from being mistaken for a failed motor.
How Do You Check Freightliner M2 Blower Motor Wiring and Connectors?
Check Freightliner M2 blower motor wiring and connectors for loose terminals, corrosion, overheated connections, melted housings, damaged insulation, open circuits, short circuits, and excessive resistance. Wiring and connector faults can cause a completely dead blower, intermittent operation, reduced motor performance, repeated fuse failure, or voltage that disappears when the motor is placed under load.
Begin with the blower motor connector and follow the accessible circuit toward its power, ground, and control components. Inspect both sides of each relevant connector rather than looking only at the external housing. A terminal can become loose, oxidized, pushed back, or heat-damaged while the outside of the connector still appears usable. Discoloration, distorted plastic, or a terminal that no longer grips securely indicates that the connection requires closer diagnosis.
A burned or melted blower connector indicates excessive heat at the connection. Electrical resistance at a loose, corroded, or damaged terminal generates heat as current passes through it. High current demand can make the condition worse. The resulting voltage drop can reduce blower performance while additional heat progressively damages the terminal and connector housing. For this reason, replacing a visibly damaged connector without determining why it overheated can leave the underlying problem unresolved.
Use electrical measurements to verify wiring condition when visual inspection does not reveal the fault. Continuity testing can help identify an open circuit when the circuit is properly isolated, while voltage-drop testing is more useful for finding unwanted resistance under load. A wire or connector may pass a basic continuity test but still restrict current when the blower motor operates. Testing the circuit under operating conditions provides stronger evidence of its actual condition.
Wiring should also be inspected when the blower fuse repeatedly opens. Damaged insulation can allow a conductor to contact ground, creating a short circuit and causing the fuse to protect the circuit by opening. Pay particular attention to wiring near connectors, mounting points, sharp edges, and areas exposed to movement or heat. Repair damaged wiring using an appropriate automotive electrical repair method and restore the harness so it is protected from the condition that caused the original damage.
Ground connections require the same level of inspection as the power side. A poor blower motor ground can create voltage drop, intermittent operation, or insufficient current flow even when supply voltage is present. Clean or repair corroded and loose ground connections as required, then test the blower again under load to verify that the repair has corrected the fault.
How Do You Fix a Freightliner M2 Blower Motor That Is Not Working?
Fix a Freightliner M2 blower motor by repairing the component or circuit fault identified during diagnosis rather than replacing the blower motor automatically. The required repair can involve the fuse circuit, relay, speed controller or resistor, power supply, ground, wiring, connector, HVAC control circuit, or blower motor itself.
Replace a blown fuse with the specified fuse only after checking why it opened. If the correct replacement fuse immediately or repeatedly blows, diagnose the circuit for a short, wiring damage, connector problems, or excessive motor current. Installing larger fuses is not a repair because it changes the circuit protection without eliminating the electrical fault.
Replace a faulty relay when testing confirms that the relay receives the required inputs but fails to provide the appropriate switched output. Repair the relay socket instead or at the same time if its terminals are loose, corroded, or heat-damaged. A new relay cannot correct an unreliable electrical connection in its socket.
Repair or replace the applicable blower speed-control component when testing isolates the fault to that circuit. For example, a blower that operates at some speeds but not others requires diagnosis of the resistor, electronic controller, HVAC control input, and related wiring according to the system installed on the truck. Inspect the associated connector before installing a replacement component because heat-damaged terminals can contribute to repeat failures.
Repair poor grounds, damaged wiring, and defective connectors when electrical testing identifies excessive resistance, an open circuit, a short, or an unstable connection. After the repair, repeat the voltage and ground tests with the blower operating. A successful electrical repair should restore the required circuit conditions under load rather than merely producing continuity with the motor switched off.
Replace the blower motor when testing confirms that the circuit supplies the required power and ground but the motor does not operate correctly. Internal motor failure becomes especially likely when correct electrical conditions remain present during a no-operation event. Abnormal mechanical noise, intermittent internal operation, or excessive current draw can provide additional evidence when confirmed through appropriate testing.
The repair decision should follow the diagnostic result: restore circuit protection when the underlying fault has been corrected, replace a confirmed failed relay or speed-control component, repair defective wiring or grounds, and replace the blower motor only when the motor itself has been isolated as the failure. Testing the blower through its available speed settings after the repair confirms whether normal HVAC blower operation has been restored.
How Do You Replace a Failed Freightliner M2 Blower Motor?
Replace a Freightliner M2 blower motor only after testing confirms that the motor has failed and the power, ground, wiring, and control circuit are functioning correctly. The general replacement process involves isolating electrical power as required, accessing the blower assembly, disconnecting the motor connector, removing the mounting hardware, removing the old motor, inspecting the surrounding components, installing the replacement motor, and testing HVAC blower operation.
Start by switching off the HVAC system and isolating electrical power according to the appropriate service procedure. The exact blower location, access method, fastener arrangement, and electrical configuration can differ by Freightliner M2 model year and cab specification. Use service information for the specific truck instead of assuming that another M2 uses an identical installation.
Access the blower motor and inspect the area before removing it. Pay particular attention to the electrical connector and wiring because replacing the motor will not correct a damaged power or ground connection. A melted connector, discolored terminal, damaged wire, or evidence of excessive heat should be diagnosed and repaired before the new motor is placed into service.
Disconnect the blower motor electrical connector and remove the hardware securing the motor or blower assembly. Support the assembly during removal to avoid damaging nearby wiring or HVAC components. Once removed, inspect the blower wheel and surrounding housing for debris, physical interference, or damage that could restrict rotation. Mechanical resistance can increase the load placed on the motor and should be corrected before installation.
Install the replacement motor in the correct position and secure it according to the applicable service procedure. Reconnect the electrical connector and confirm that the terminals fit securely. Wiring should be routed away from sharp edges, moving components, and other areas that could damage the insulation.
After installation, restore electrical power and operate the HVAC blower through every available speed setting. Verify that the motor starts consistently, airflow changes with the selected speed, and the repaired circuit does not show abnormal heat, noise, or intermittent operation. If the original fault involved a blown fuse or overheated connector, recheck that part of the circuit after the motor has operated under load.
A blower motor replacement should therefore end with verification rather than installation alone. Normal operation across the available fan settings, stable electrical connections, and the absence of the original symptom confirm that the repair has addressed the problem.
Read more: Freightliner Cruise Control Not Working: Causes & Fixes
How Much Does It Cost to Fix a Freightliner M2 Blower Motor Problem?
The cost to fix a Freightliner M2 blower motor problem depends on which component actually failed, because a no-blower condition does not automatically require blower motor replacement. A fuse-related repair, relay replacement, wiring repair, speed-control failure, connector replacement, and complete blower motor replacement involve different parts and labor requirements.
A simple circuit-protection problem can require relatively little labor when the underlying cause is immediately identifiable. However, a repeatedly blown fuse can require substantially more diagnostic work because the technician must locate the short circuit, excessive current draw, damaged wire, or other fault responsible for opening the fuse. The price of the fuse itself therefore does not represent the total cost of repairing a repeated fuse failure.
Relay and speed-control repairs depend on component accessibility and the HVAC configuration installed on the truck. A failed relay can be straightforward to replace once testing confirms the fault, while a resistor, electronic blower controller, or associated connector may require additional access and electrical diagnosis. Heat damage to a connector can also increase repair work because both the damaged connection and the condition responsible for overheating should be addressed.
Wiring problems vary even more in repair complexity. An accessible damaged wire or ground connection can be repaired relatively quickly, while an intermittent open circuit or short inside a harness may require extensive tracing. Diagnostic labor can therefore represent a significant part of the total repair cost even when the replacement parts themselves are inexpensive.
Blower motor replacement adds the price of the motor and the labor required to access, remove, install, and test it. Parts pricing can vary according to model year, vehicle configuration, replacement-part manufacturer, supplier, and region. Labor cost also depends on shop rates and how much disassembly is required to reach the motor.
For these reasons, a single repair price would not accurately represent every Freightliner M2 blower problem. The most useful cost estimate comes after diagnosis identifies whether the fault is in the fuse circuit, relay, speed controller, wiring, connector, ground, HVAC controls, or blower motor. A parts-and-labor estimate can then be based on the actual failed component rather than on the initial symptom alone.
When Should a Freightliner M2 Blower Motor Problem Be Diagnosed by a Professional?
A Freightliner M2 blower motor problem should be professionally diagnosed when the fuse repeatedly blows, wiring or connectors overheat, electrical test results are inconsistent, the blower control circuit cannot be isolated, or the repair requires model-specific wiring information and advanced electrical testing. These conditions indicate that replacing individual components without further diagnosis could leave the original fault unresolved.
Repeated fuse failure is one of the clearest reasons to stop replacing parts and investigate the circuit more deeply. A fuse that opens again after being replaced with the specified rating indicates that excessive current is still present. The underlying problem can involve a short circuit, damaged wiring, a defective electrical component, or excessive blower motor current draw. Installing another fuse without finding the cause does not repair the circuit, and installing a higher-rated fuse can remove the intended protection from the wiring.
Overheated or melted connectors also require careful diagnosis. Heat at a blower motor, relay, resistor, controller, or wiring connection can result from excessive resistance, poor terminal contact, abnormal current demand, or a combination of these conditions. Replacing only the visibly damaged connector may provide a temporary repair if the condition that generated the heat remains in the circuit.
Professional diagnosis is also appropriate when voltage and ground measurements change unpredictably. Intermittent electrical faults can appear only during vibration, temperature changes, or high electrical load. A technician can test the circuit while the symptom is present and use voltage-drop measurements, wiring information, and circuit isolation to determine where electrical power or ground is being lost.
The HVAC control side can require additional diagnosis when the blower motor, fuse, relevant relay, wiring, and ground test correctly but the expected control signal is missing. Freightliner M2 electrical and HVAC configurations can vary by model year and vehicle specification. Accurate wiring diagrams and service information become particularly important when tracing control inputs and outputs rather than testing a simple power circuit.
A professional diagnosis is not necessary for every blower problem. A straightforward fault can be repaired once testing clearly identifies the failed component or connection. Professional electrical diagnosis becomes valuable when the fault cannot be isolated with basic power and ground testing, repeatedly damages circuit protection, produces excessive heat, or involves an intermittent or control-side electrical problem.
The diagnostic objective remains the same regardless of who performs the repair: identify the failed circuit or component before replacing parts. Following the sequence of symptom identification, fuse and relay checks, power and ground testing, speed-control diagnosis, motor testing, and wiring inspection provides a more reliable path to restoring Freightliner M2 blower operation.
1 thought on “Freightliner M2 Blower Motor Not Working: 7 Causes”